Our goal is to make the install a breeze. Please read the entire guide. Any time you see a 🔧 that tool is available
on our Amazon tool page. If you have a tech question, you can
text us here.
Installing this kit with a pit or lift 🔧 or the body off is recommended. Being comfortable in an installation is paramount to doing a quality job. Being able to see is crucial in measuring, leveling, etc. So this install will be written as you install it on a lift.
Disconnect the battery.
Disconnect the e-brake cables inside the vehicle.
Roll the vehicle onto the lift or between the posts.
Lift from the torsion tube on the rear and the two bolts on each side of the "Napoleon Hat" (outer front edge of pan half).
Remove the rear wheels.
Remove the (3) bolts that hold the axle tube to the spring plate. You will need to reuse these bolts.
Remove the shock absorber by removing the upper and lower bolts. You will be using this hardware again.
Remove the (4) bolts holding the spring plate cap.
Please read this entire step before beginning. Be very careful and wear safety goggles 🔧 ! Using a pry bar 🔧 release the tension of the factory torsion bars inside by prying the spring plate off its perch. Be careful because the spring plate is going to spring down extremely hard. It may be better to stand towards the car's front and pry underneath it. Once removed, remove the torsion bar and the rubber doughnuts and set aside. You will no longer need the torsion bars. Please do not damage the doughnuts when removing them because you will need to reuse them.
This step can be modified to achieve the desired height of the vehicle. With the template in this PDF, mark the spring plate for notching. You now have the option to go all the way down by cutting 🔧 it where you just marked with the template, or you can just cut a little bit not to go as low.
Paint 🔧 the spring plate with paint so it will not rust.
Lube 🔧 up the rubber doughnuts and install them onto the spring plate. Bolt them up using the original hardware. Now your car will move up and down freely.
Reinstall the original axle bolts and tighten them down. Always use removable Loctite 🔧 when installing the original bolts. This will give you the peace of mind that they will not come loose on you.
Repeat steps 4 through 12 on the other side of the car.
Your car is now rid of the factory-sprung torsion bars and can ride on just the airbags installed in the next few steps. You will now need to put the lower trailing arms together now. You will need (1) left-hand heim-joint, (1) 3/4" jam left-hand nut, (1) right-hand heim-joint, (1) 3/4" jam right-hand nut, and (2) 3/4" washers for each side. With the heim-joints in hand, spin the nut and install a washer afterward. Install the heim's on both ends of the control arms until they bottom out. Using the four trailing arm hangers, bolt one on each side of the heim with the supplied 12mm bolts, washers, and nylocs. On the other side of the hangers, install a heim-joint with the ½" bolts, washers, and nylocs. This heim needs to have a jam nut, washer, upper control arm hanger mount, a 3/4" washer, followed by a jam nut installed. Note that one side is the right hand, and the other is the left. Jam nuts are also this same way.
You will now need to install your new shocks. The new shocks have steel spacers inside the box and must be pressed into the shock ends. This will allow the shock to be torqued down but does not allow the shock bushing to become smashed.
With the existing hardware, install the upper portion of the shock and tighten it.
To install the lower shock, you will need to do the following. Take the supplied 130mm bolt (the long one), install a 12mm washer on it, followed by a stepped bushing, and slide the assembly onto the back end of the control arm (the hole in the trailing arm will be closer to the back end of the vehicle). Install another stepped bushing onto the bolt and slide it through the lower shock mount from the side of the car. Install it on the lower part of the shock onto it, install a 12mm washer and nyloc, and tighten.
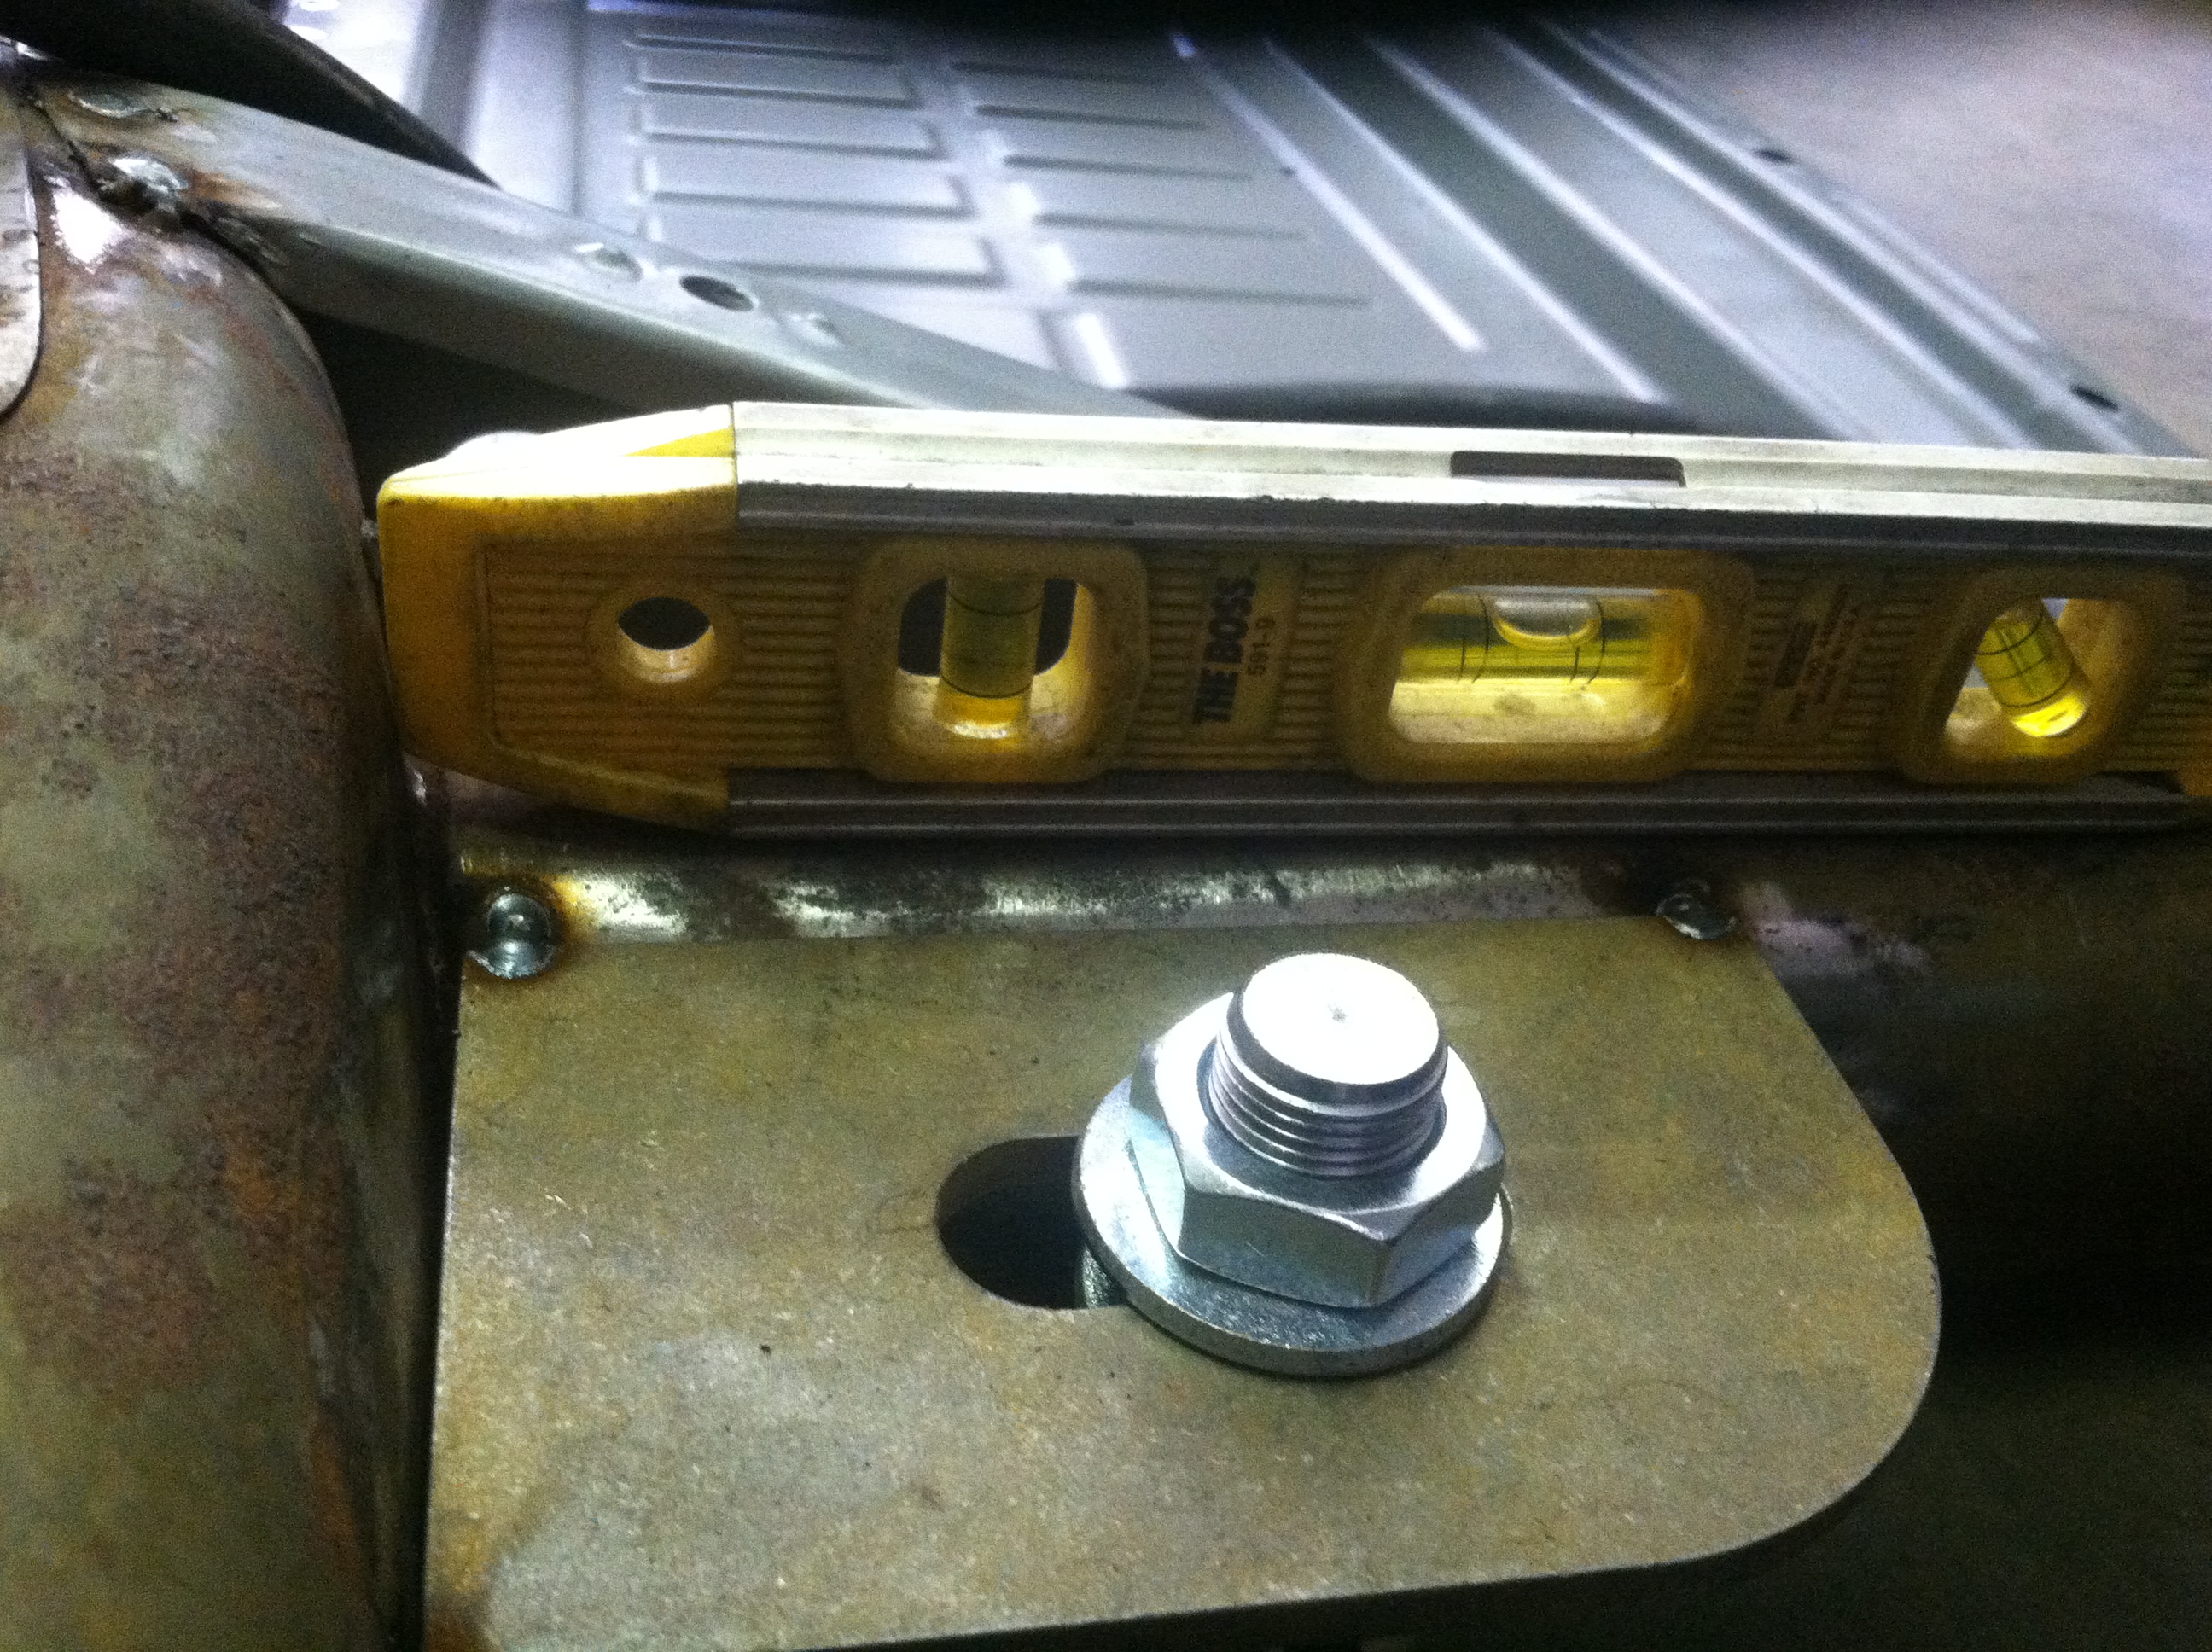
Grind 🔧 away the surface paint or undercoating on the torsion housing to allow for welding the upper control arm hanger mount.
You must tack weld 🔧 this hanger mounts about ¼" from the top of the torsion tube. Make sure the mount is level 🔧. Once both sides are the same, weld in. Like this.
In the following steps, you will need to sand 🔧 the back side of the torsion housing next to the shock mount for welding.
Mount the airbag to the control arm with the supplied 2.250" bolts. Leave loose for adjustments.
Install the upper top mount to the airbag with the supplied bolts and 3/8" washers. Leave them loose for adjustments as well. Every car is different because the factory torsion can have different gaps and casting marks in the torsions. So you might have to do some slotting or grinding 🔧 to the upper mount to make them fit properly.
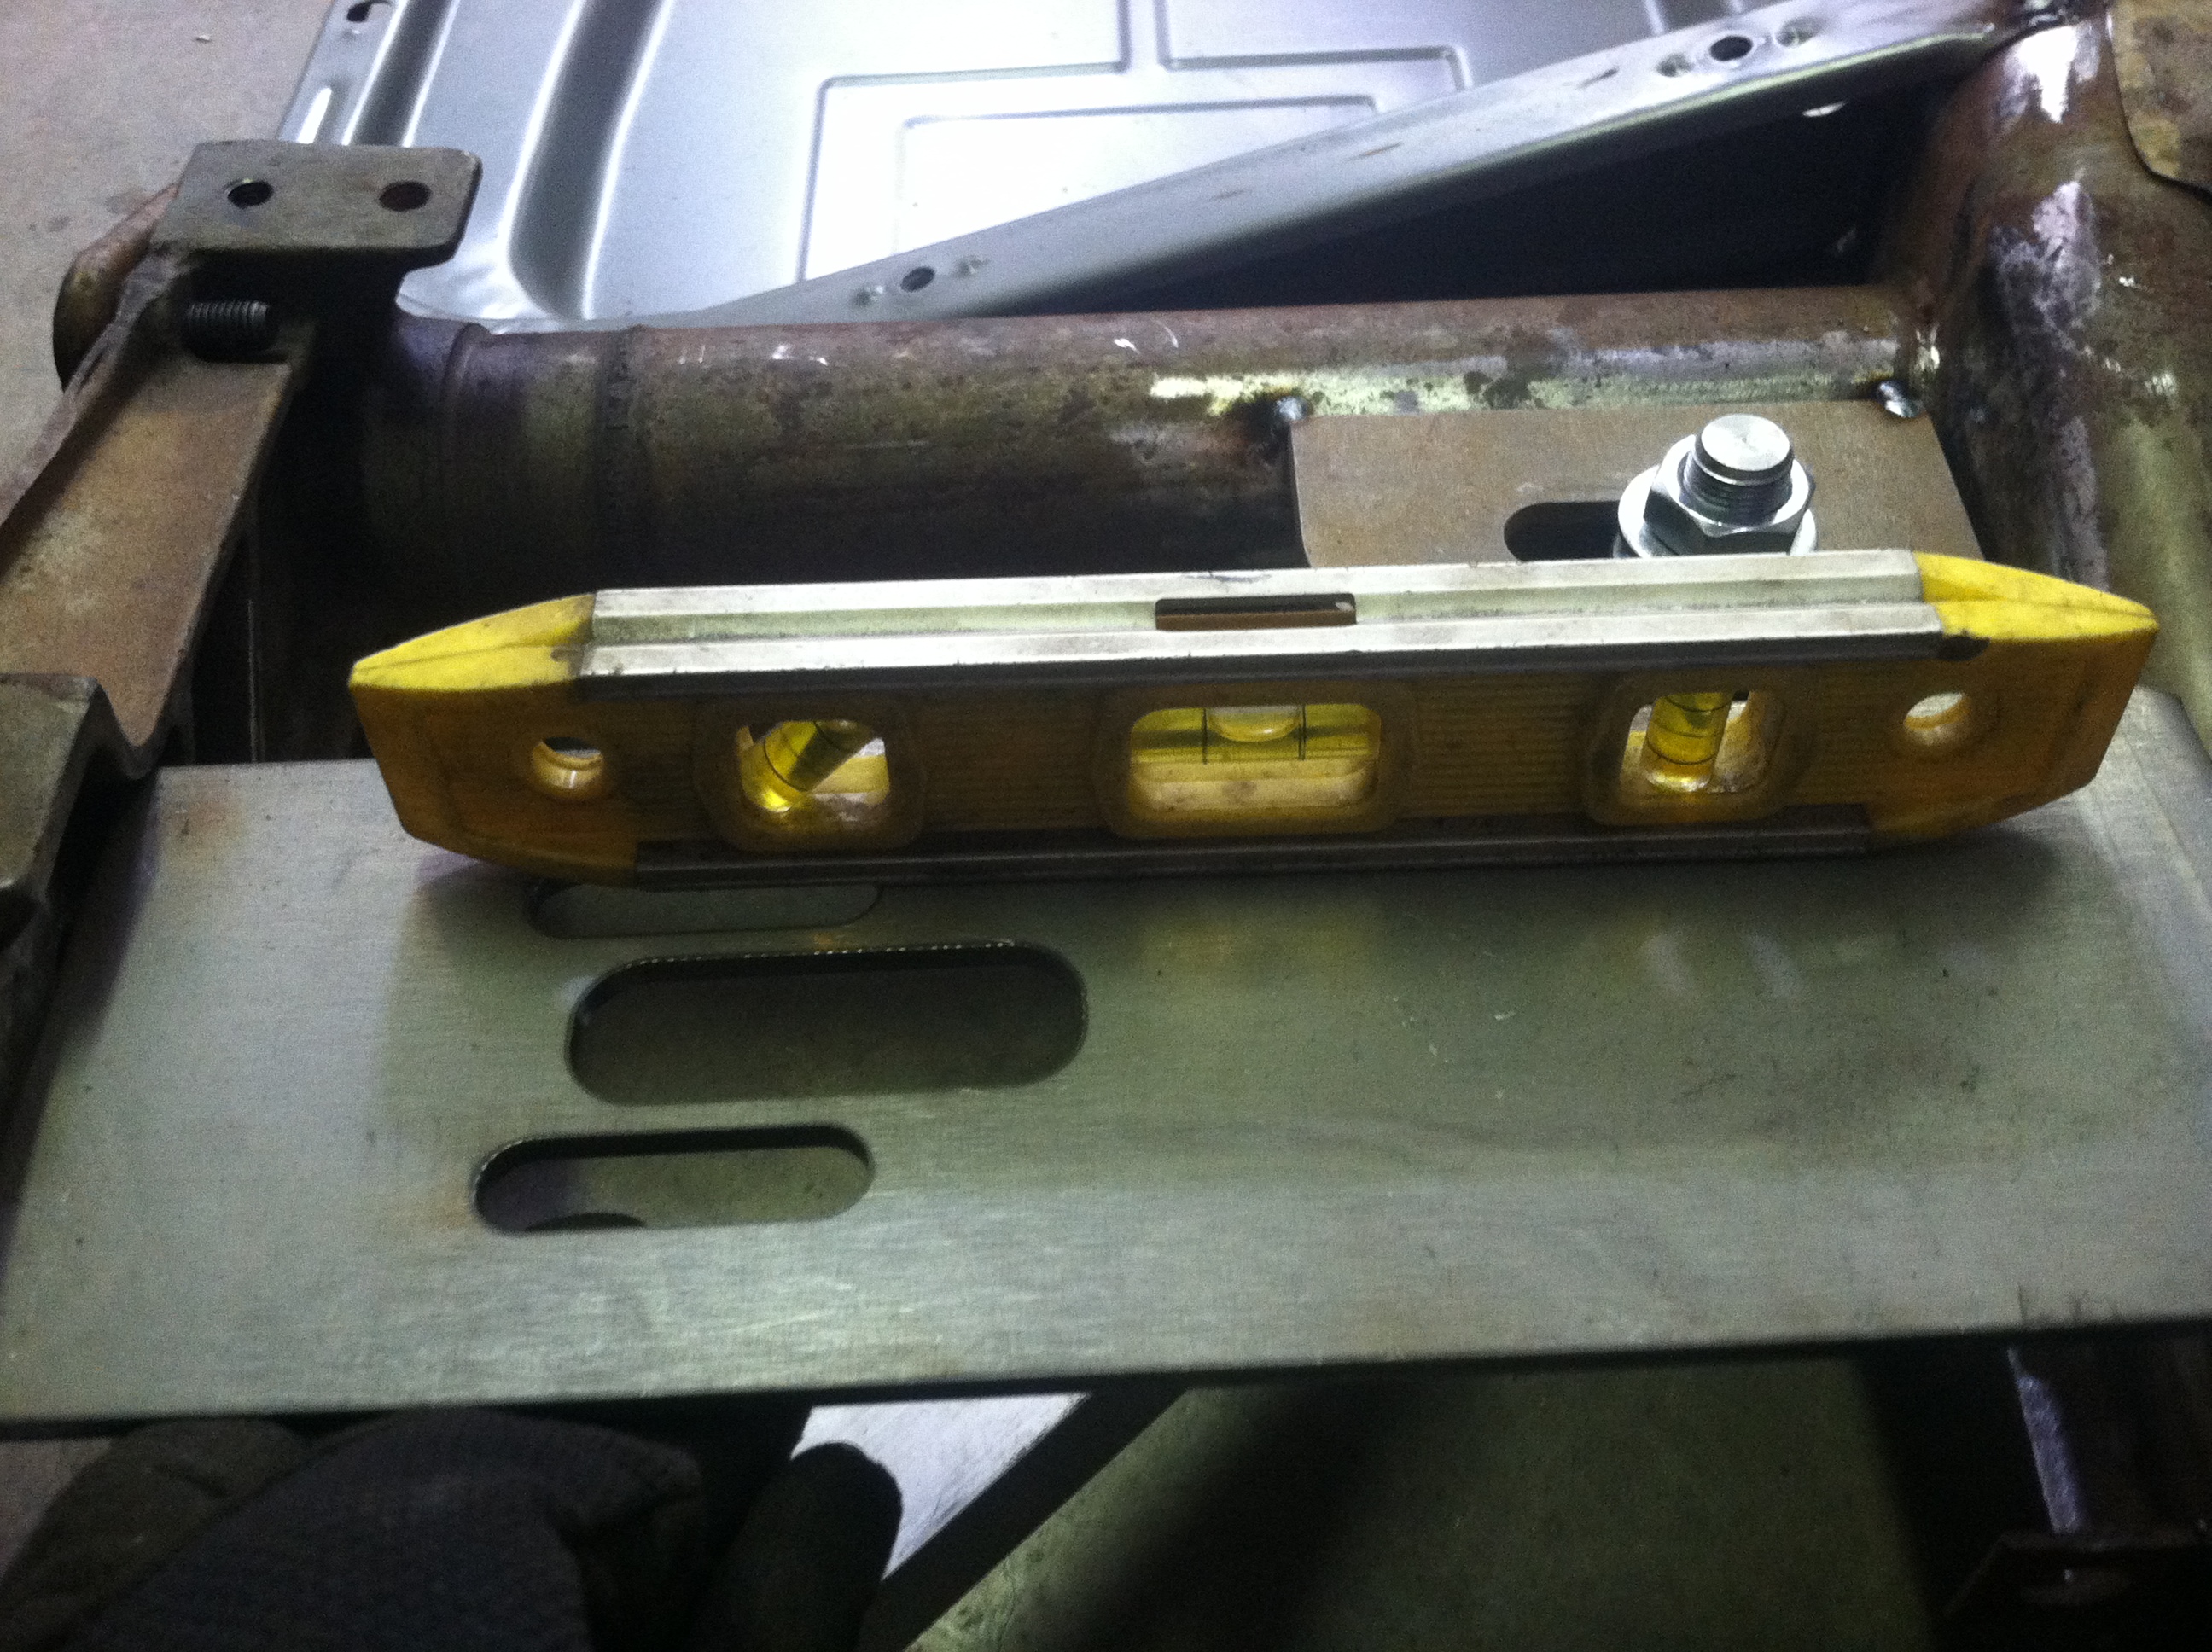
Lift the rear suspension until the suspension travel has hit the stops in the torsion. This is where the car will be at its lowest point. You can use duct tape 🔧 over the bag's hole to keep it at a collapsed height. Squeeze the bag until it's deflated and the mount is flush with the torsion housing. You will now verify that the bag looks like two donuts stacked on one another. This is where the upper bag mount will end up. Before tacking it into place, ensure it is level with the torsion tube and parallel to it. Then tack it into place.
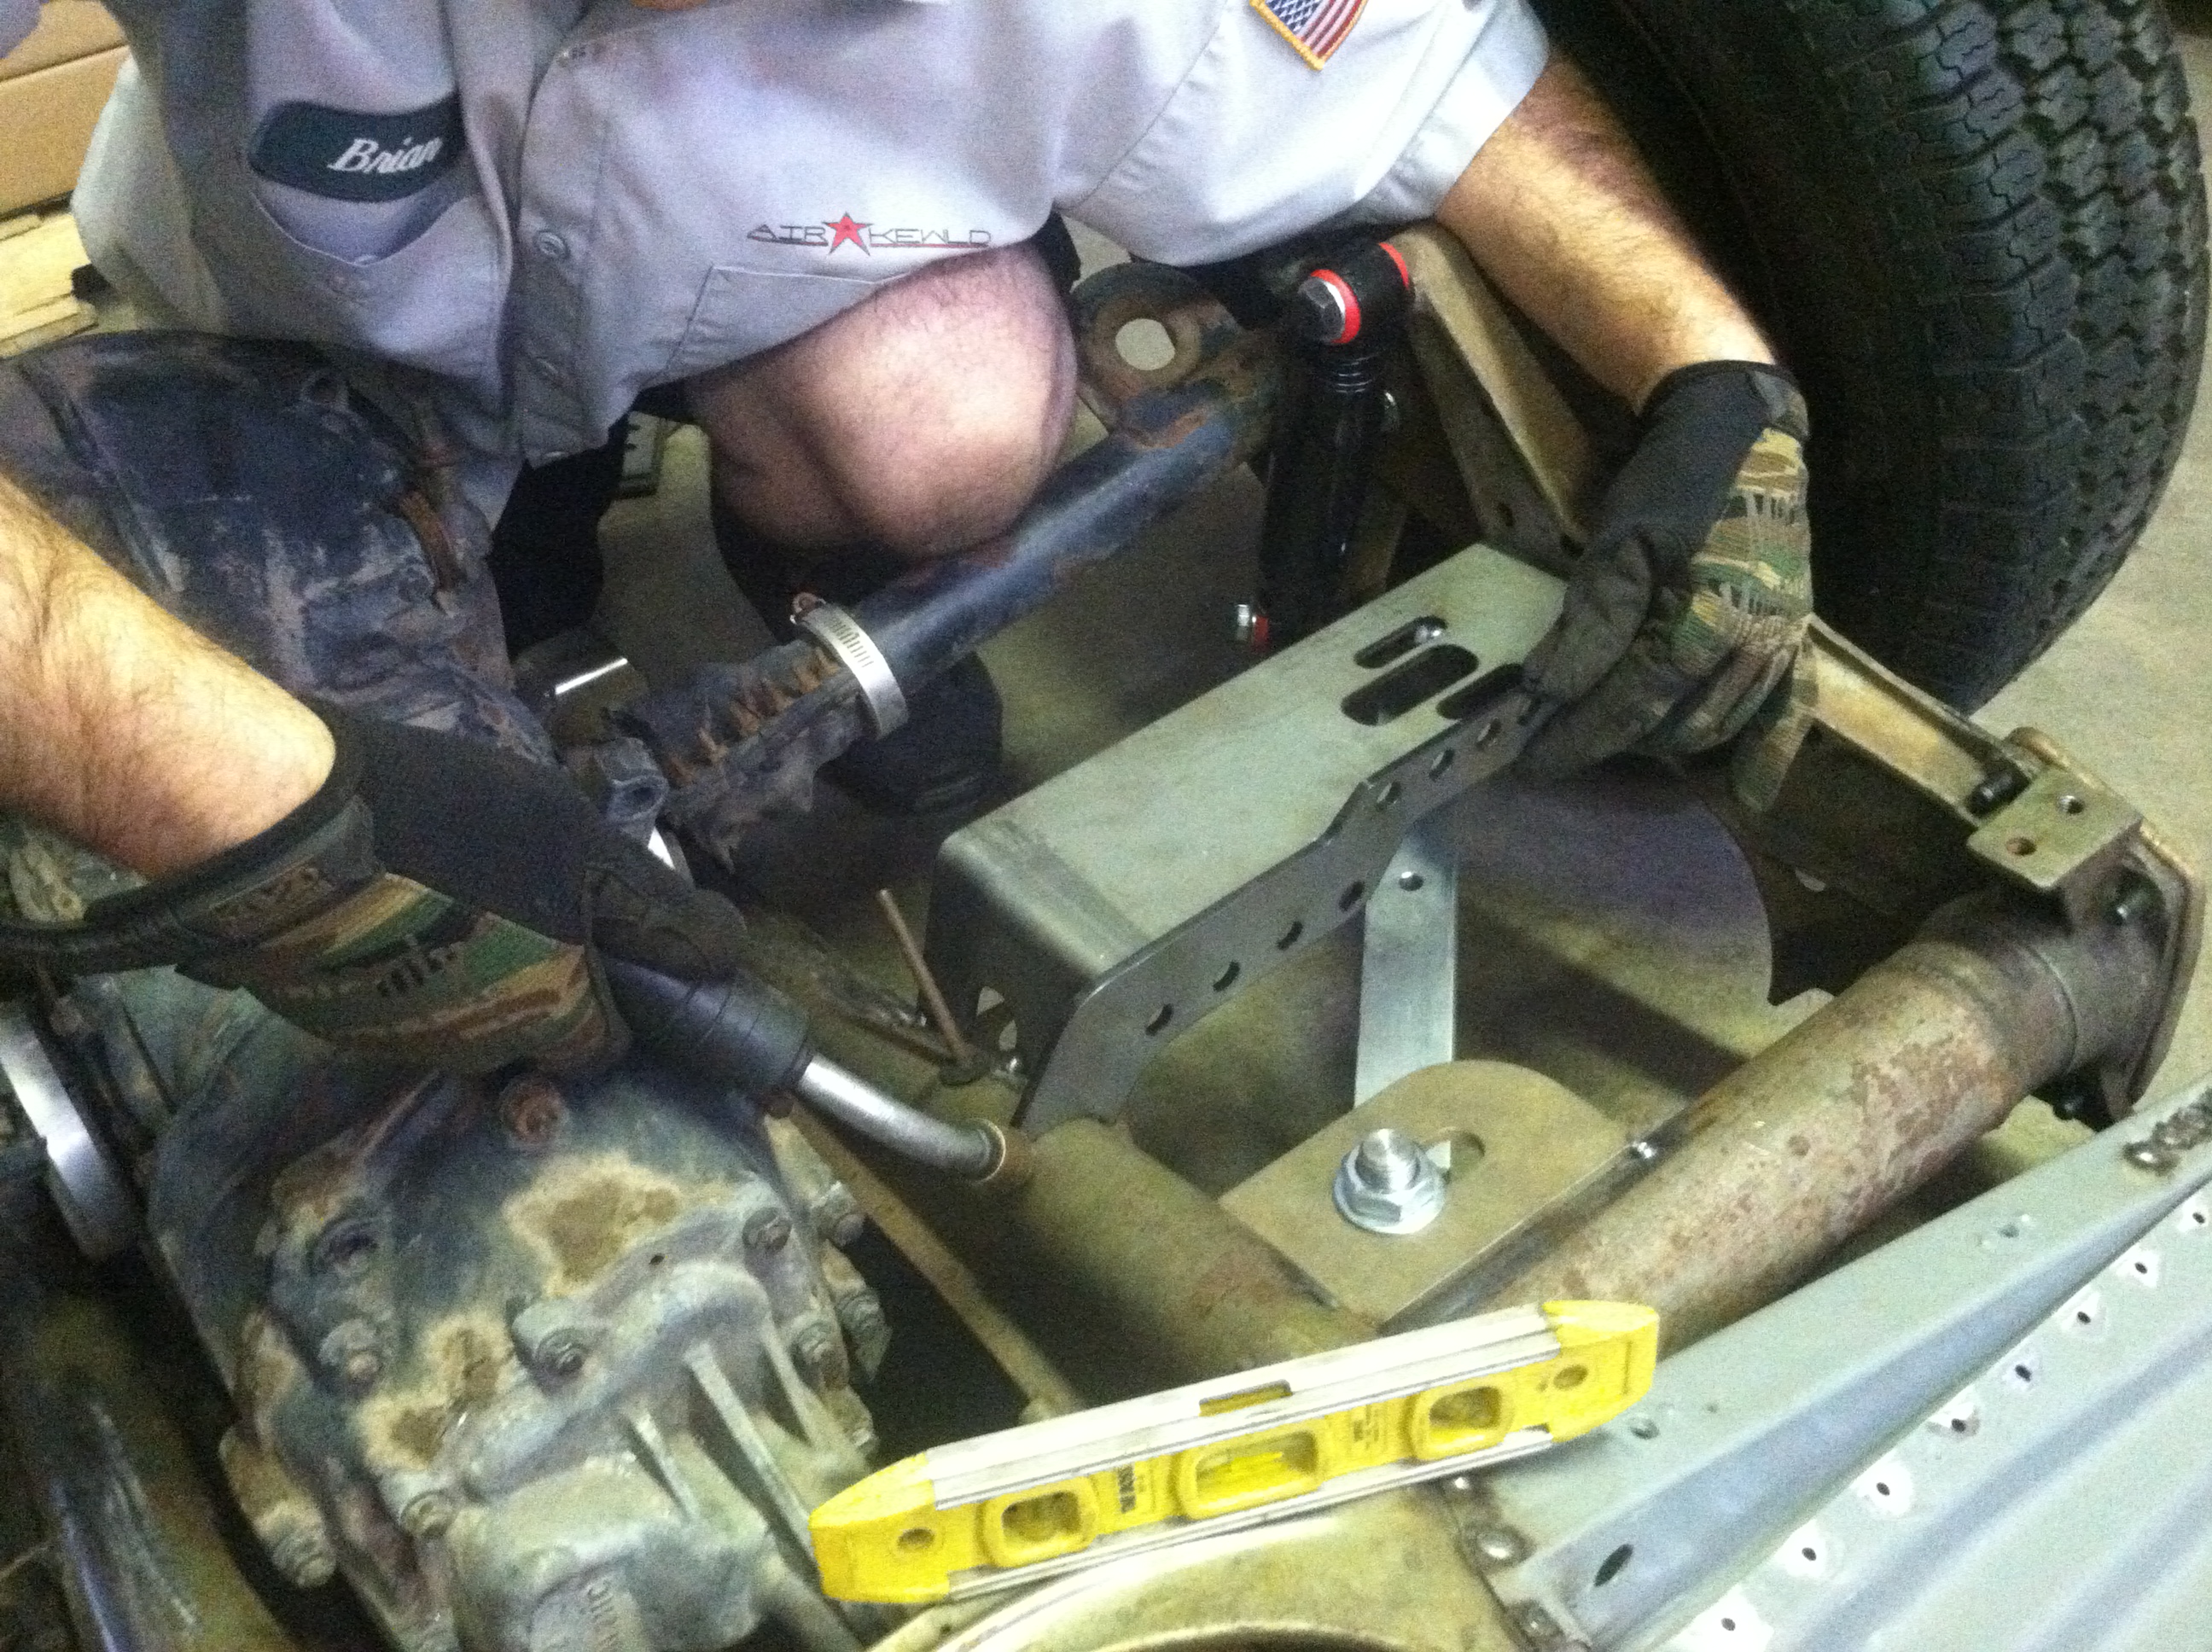
With the frontmost brackets, they will need to sit on the side of the upper bracket and flush with the bottom side of the upper bracket. This will allow the bag to sit flat and not have any interference. Once again, because all torsions are different, notching or grinding the bracket to fit might be needed. Once you like the way this bracket fits, tack it in.
On the rearmost bracket, it will be similar in installation. It will also need to sit flat against the upper bracket and flush with it. The same can be said of the notching or grinding to meet the specific installation of your vehicle. Once you are happy with the fit, tack it in.
Check the travel of the control arm by lowering and raising the suspension. Make sure that the airbag does not touch anything. This will lead to rubbing and may puncture the bag.
Once completely satisfied, remove the airbag and weld in the upper mount. Once it has cooled, paint 🔧 it so it will not rust and reinstall the airbag with the fore mentioned hardware.
With the supplied ½" reducers, apply Teflon tape 🔧 to them and install them into the airbags.
Insert the 90-degree push-loc fittings into the previously mentioned bushing.
Run your lines to your management and pressure test. If you take the time to leak-test them, you will be fine. Take a soapy solution, spray around the fittings to see if you have a leak, and fix it accordingly.
Reinstall your wheels, tires, and eBrake cables, then lower the vehicle. Ensure you have air in it to get the jack out. Now deflate! BOOM! Rock bottom!
If your early Beetle or Ghia is outfitted with original axle tubes in which the shock flanges on the trans-axle are parallel with the chassis, they must be switched out to a later version found here.

